
I know what you are thinking, "there are two Humbug Mountains on the Oregon coast, so which one are we discussing here?" Or perhaps you have followed that thought out to "And why are there 2 Humbug Mountains. Hell, why is there 1 Humbug Mountain?"
You ask a lot of questions for so early in the blog.
We hiked the southern Humbug. The one that shows up in most of the google searches and is a state park with a great trail. The one that has the dubious bragging right of being the tallest Mountain in Oregon (that rises straight up from the ocean). Sort of like being the smartest kid in third grade that sits in the back of the class nearest to the door.
The other Humbug is even less famous. It is the one that sits in the shadow of and gives you a good view of Saddle Mountain (the famous mountain that Lewis and Clark could see from Astoria and mentioned in their journals). That Humbug is also famous for being seriously clear cut forested and then having a black and white photographer make art of the destruction.
 |
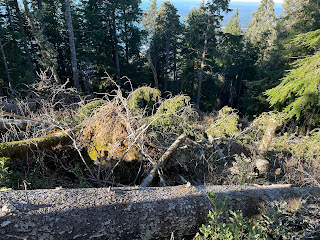
| Lots of Clear Cut areas near both Humbugs |
The southern Humbug (the one we are hiking) was named by some guy who got lost and was made about it. Humbug evidently being a derogatory term. Wikipedia says: in 1851 it began to be called Tichenor's Humbug when an exploring party sent by Captain William V. Tichenor, founder of Port Orford, got lost and headed north of the port instead of south. Tichenor stated that the name was chosen "to palliate their gross failure."


Today, it is a significant headland of the Oregon Coast. It rises up hundreds of feet higher than the surrounding coastline and sticks out a bit thus forming a weather barrier going up the coast. it also is rugged enough that it forces the coast highway to turn inland around the mountain. Old route 1 used to go on the seaward side, but was evidently too expensive to keep up. You can still hike that old highway, however.
Today we are hiking up to the summit. We are hoping for a good view. The summit was in clouds when we were approaching in car from the North, but the sun was out and the weather was warm and I have high hopes that the clouds will burn off before we get up the 1800 feet and 3 miles to the summit.

The trailhead parking lot was cold, icy and muddy. Not a good omen. But that turned out to be the worst of it. The trail itself was dry and well maintained, with large wooden posts with milage markers every quarter mile all the way up.
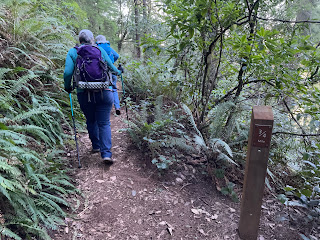
This is a medium steep hike. The first mile does get you heart beating, not only with the incline but also with the beautiful views of huge old trees and a couple of glimpses through clearings at the north coastline (looking up to Port Orford). After a mile of long switchbacks, you come to a junction where you can take the Eastern trail or the Western Trail. These two trails go in different directions up the mountain and meet at the summit. They are both signed with the mile markers (all pointing down hill) and are about the same length. The Western Trail is a bit shorter (and thus, steeper). If you have bad knees (and want to hike both trails) I would do the steep trail going up. Might sound counter intuitive but at least for me, going up is easier than going down.

The flora is typical Oregon Coast rain forest. Mostly Douglas Fir with some Sitka and Alder. There was a grove of Myrtlewood down at the base (at the Day Use Area which also offers the a local bathroom) but we didn't think we saw any on the hike. The entire mountain is steep and rocky and doesn't hold much topsoil. With that and the big storms that come in from the ocean, there is a limit to how big a tree can get before it and all of its immediate neighbors get blown down, causing much ruckus on the side of the mountain and often impacting hiking on the trail.

When you get to the top intersection of the two trails, there is a side trail that goes up to summit. The summit itself is devoid of trees. I am guessing they just can't get a hold before being blown down. The side facing away from the ocean was a trail cut (with chainsaw) through a number of big trees that had been blown down in the last few years. The view from the summit is gorgeous. It is south facing and you can see the rocky coast looking down past Gold Beach. The Rogue river must be there someplace but I couldn't place it from up there.


And we had Sun !! Such glorious sun. We had shed our outer layers on the way up the hill, and usually once on top you would have to layer up as you cooled down, but today, we could sit on the top of the world in the warm sun and just luxuriate. We were very tempted to take a little nap in the sun after we had finished our picnic.

We came back down the back (east) side. Less sunshine, a little cooler, and a few places where we had to crawl over and under logs. But going downhill is usually much faster than up and we were warmed up, had our tracking poles out, and had a most enjoyable stroll back to the car.

A great hike. A great view. Very few other hikers (though the size of the parking lot argues for crowds in the summer).


